wp 7.0
compatible
php 8.4
compatible

The web deals in data, so in lots of cases you’ll want to provide functionality to help your users interact with it. A file uploader is a common addition, because it can help facilitate data sharing between the site and users. The good news is it’s straightforward to upload files from the front end of your website using a WordPress plugin.
Shared Files offers a file uploader for free that’s also secure. This is important, because not all of your users will have good intentions. However, with the right functionality under the hood, you can provide a safe experience with high usability.
For this post, we’re going to look at how you can upload files from the front end using the Shared Files plugin. Before this, we’ll highlight why you’d want to provide this feature, and talk about some of the security issues you’ll encounter.
There are only a few steps you’ll need to help users upload files from the front end of your website:
At this point, you’ll have a fully-functional file uploader on the front end of your WordPress website!
Interactivity is vital for a modern website. If a user is only a passive reader, they will often find somewhere else to browse. Just as key to the modern web is usability. If your site can’t make the User Experience (UX) pleasurable in terms of interactivity and usability, this could be a death knell.
As such, letting your users upload files can be a rewarding experience for a number of reasons:
There are many more benefits, and you might already have a few in mind for your own site. However, in the next section, we’ll talk about the different ways you can create a file uploader for your site.
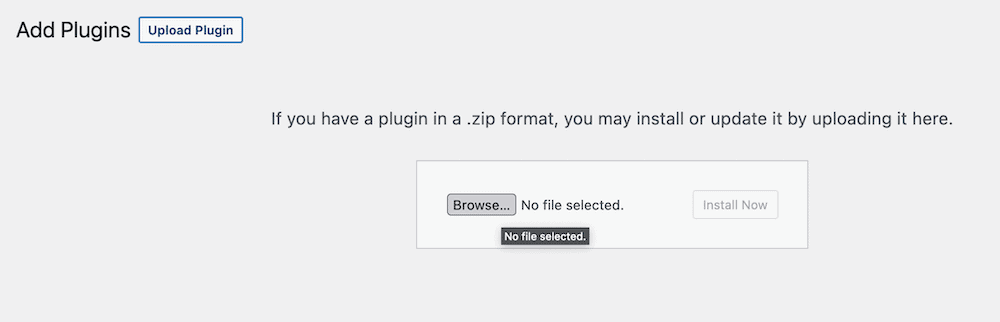
WordPress has a fantastic codebase that makes it straightforward for developers to create for the platform. Creating a file uploader is one of the simpler facets of developing a site – WordPress even uses one to help you upload premium plugins:
However, if you want to create a file uploader for yourself, you’ll need a lot of resources and skills:
Security is also something to bear in mind. If you choose to offer front end file upload functionality, this means a door into your site is ajar. As such, you’ll also need to make sure your data and that of your users is safe and secure. Failure to look at this could impact your site in the worst possible way.
Instead, you can turn to a WordPress plugin. This will already have most of the functionality you’ll need to implement a file uploader, and will come from a reputable developer in the majority of cases.
The Shared Files plugin is the number one way to list these types of files on your website, and manage them.
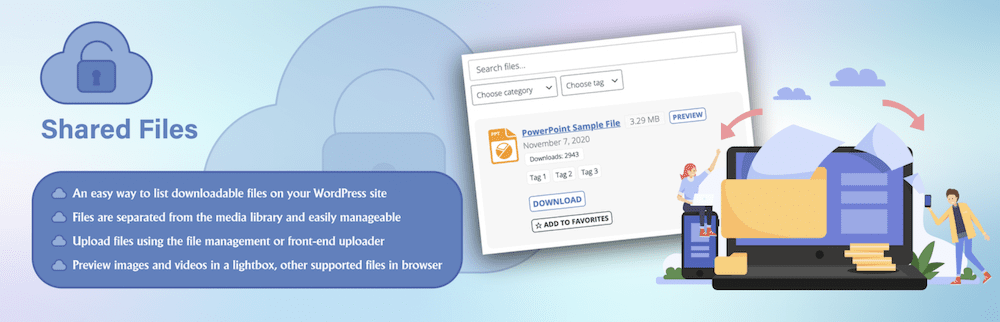
Here’s what the core features of the plugin provide:
The best news is that Shared Files is free to download and use from the WordPress Plugin Directory. This means you can also implement a file uploader for free, that’s also secure and full-featured.
Over the next few sections, we’ll show you how to add a front-end file uploader to WordPress using Shared Files. After, we’ll also go through the extra goodies that the premium Shared Files Pro can provide.
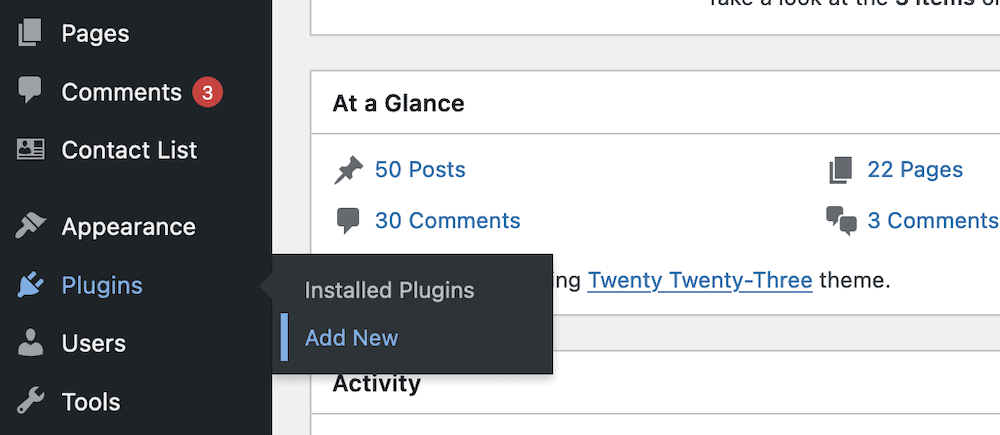
First, you’ll need to install the Shared Files plugin. This is super simple if you use the WordPress dashboard. To start, head to Plugins > Add New within WordPress:
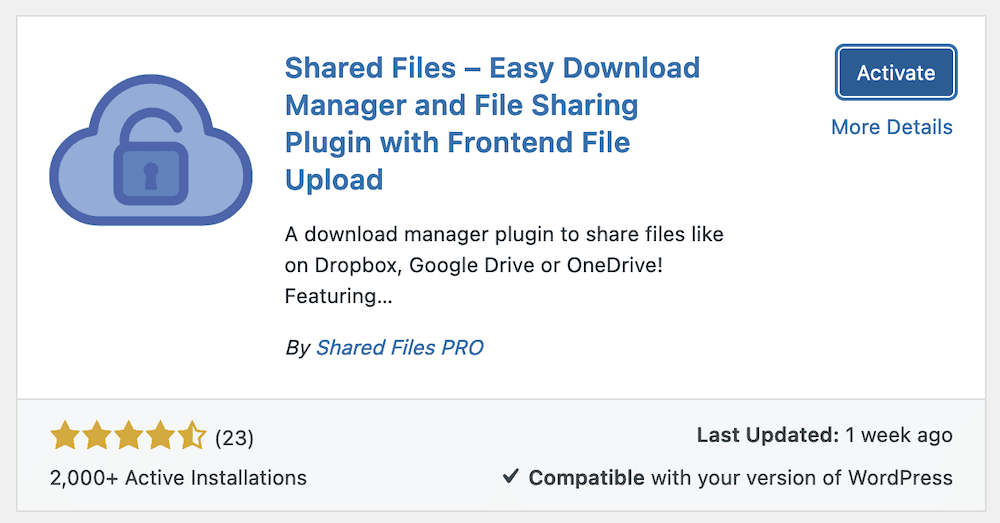
This will present a version of the WordPress Plugin Directory within your dashboard. To find the plugin, type “Shared Files” into the search bar, which should bring up the plugin’s card:
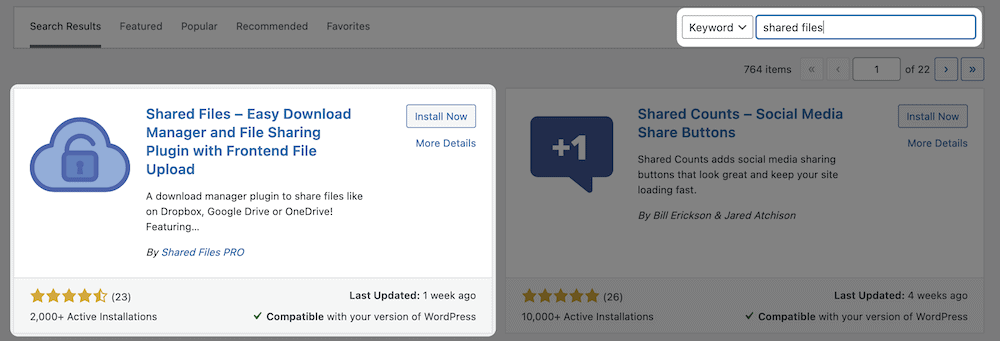
Next, click the Install Now button for the Shared Files card. This will install the plugin, but you’ll also need to activate it before you can use it. To do this, click the blue Activate button:
Once this completes, you’ll be able to start using the Shared Files plugin to implement a file uploader.
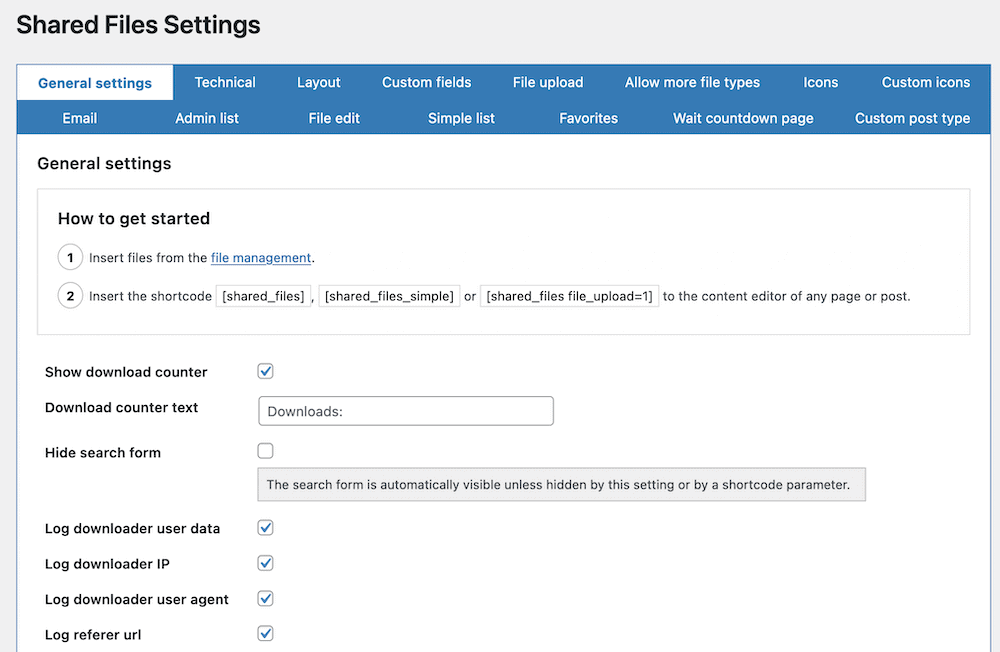
The first screen you’ll see is Shared Files’ settings. You can get to here in the future either through the Shared Files > Settings link, or the Settings > Shared Files link.
If you head to the File upload tab, you’ll be able to tinker with a slew of options. Some won’t be available to free users, but this doesn’t make the file uploader any less functional:
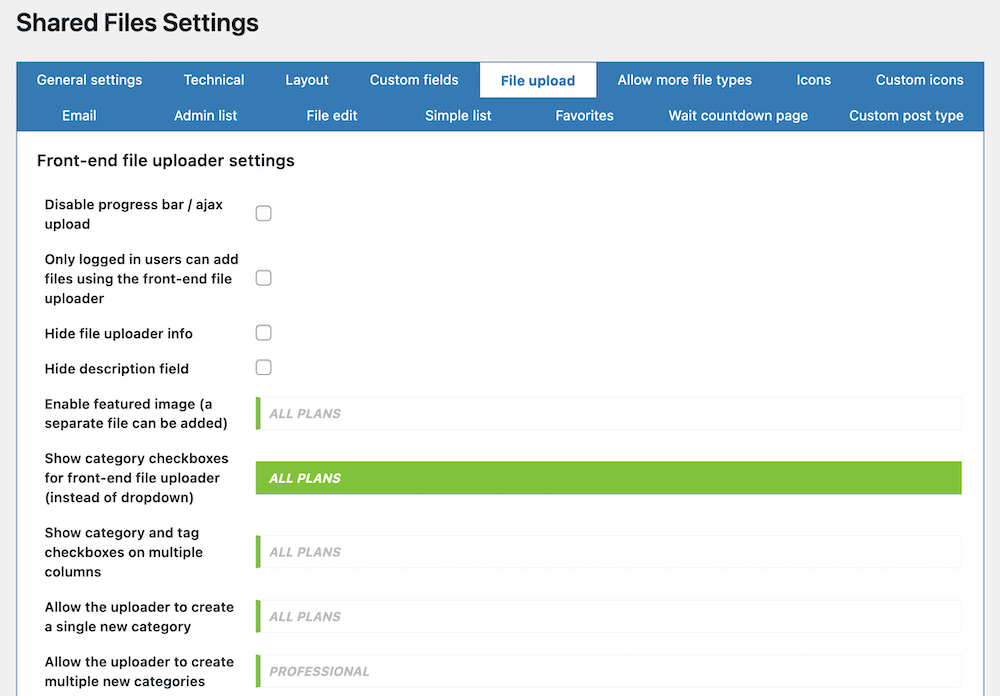
For instance, you can choose to hide some details about the file upload, restrict some users from being able to upload files, and more. However, remember to save your changes before you look to implement the file uploader, or those changes won’t apply.
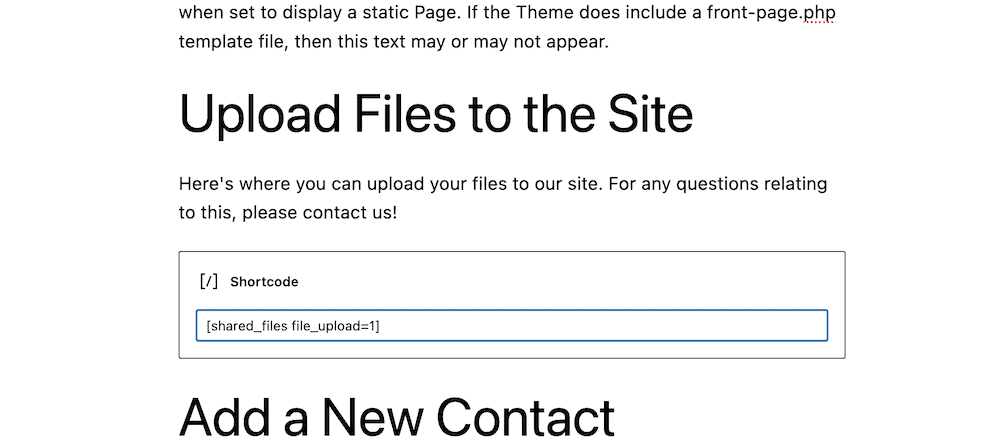
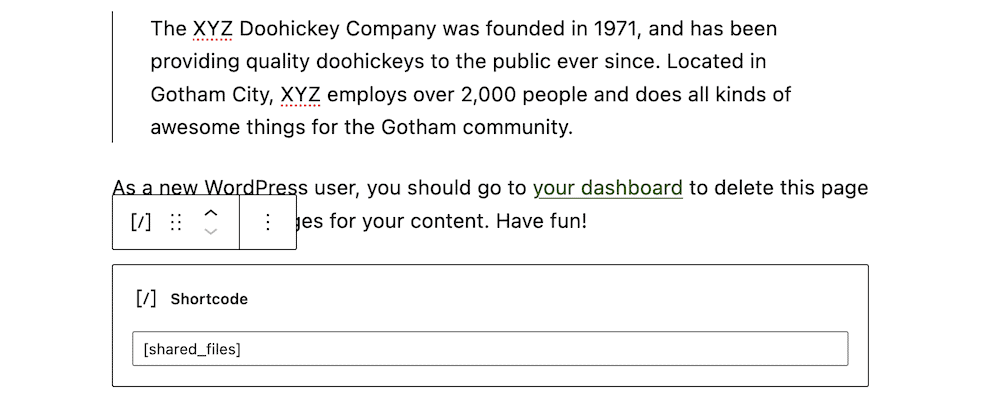
Speaking of which, you can use shortcodes to display your file uploader on the front end. If you head to Shared Files > Settings > General settings, you can find the shortcode templates ready to copy:
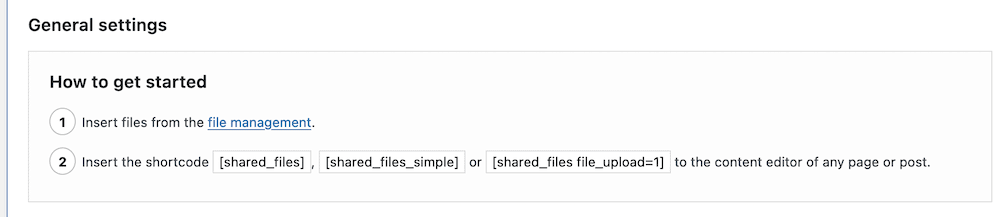
To add your uploader to your site, copy the shortcode, head to your desired post or page, and paste it in:
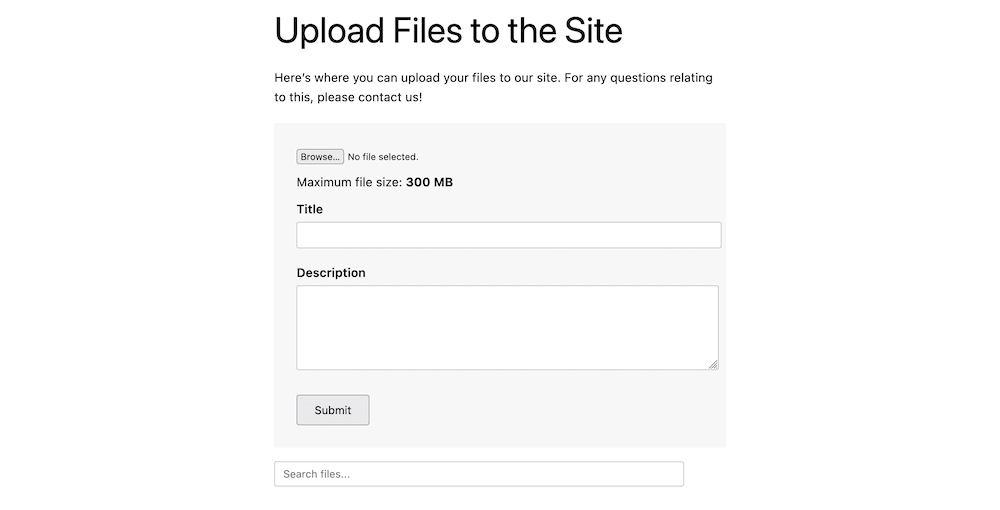
Once you save your changes and checkout the front end, you’ll see the uploader ready to roll:
Once other users begin to use the file uploader, you’ll likely have to manage those new additions. Shared Files gives you almost all of the tools you’ll need.
The Shared Files > File Management page is where you’ll browse and administrate the files users give you:
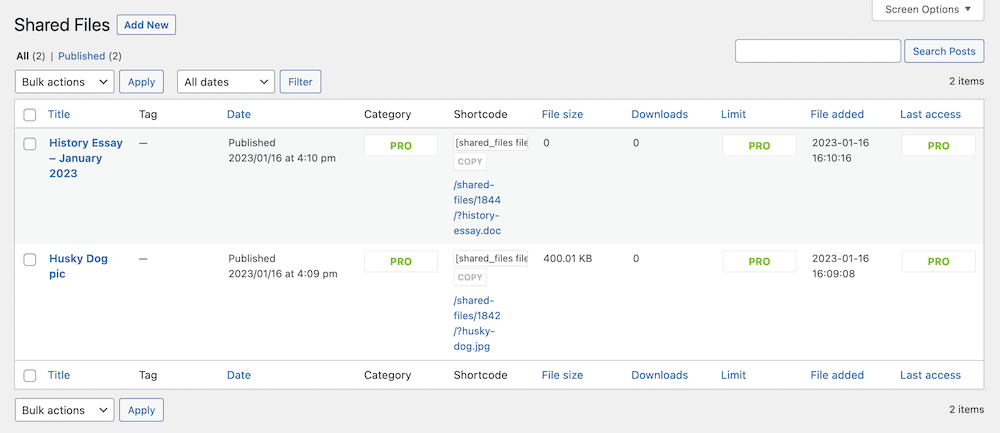
Each entry will display insights into its file size, download numbers, tags, and more. If you wish to edit a particular file, you can click through to its edit screen:
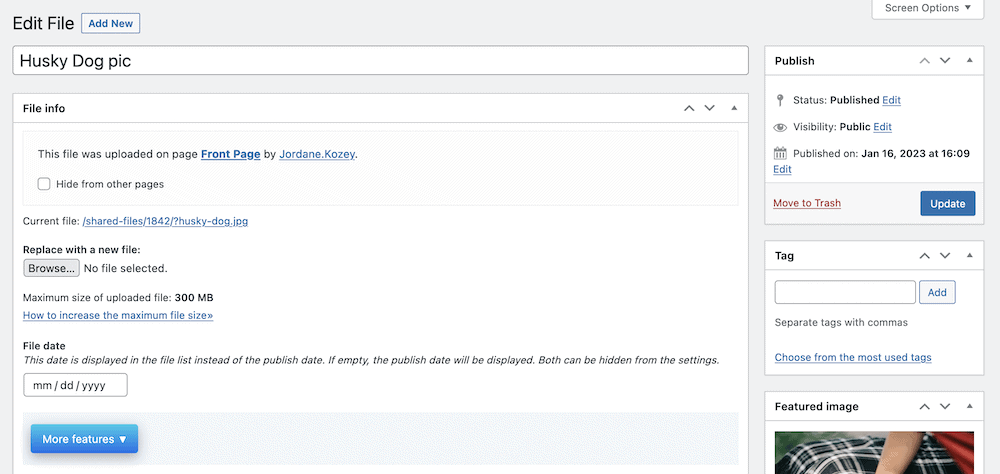
Once you make changes, click the Update button, and this will apply them. File upload management within Shared Files is straightforward and intuitive. It could be that you’ll never need to spend more than a few seconds here. However, if you purchase a license to Shared Files Pro (more of which later,) you’ll have a greater set of features to play with here.
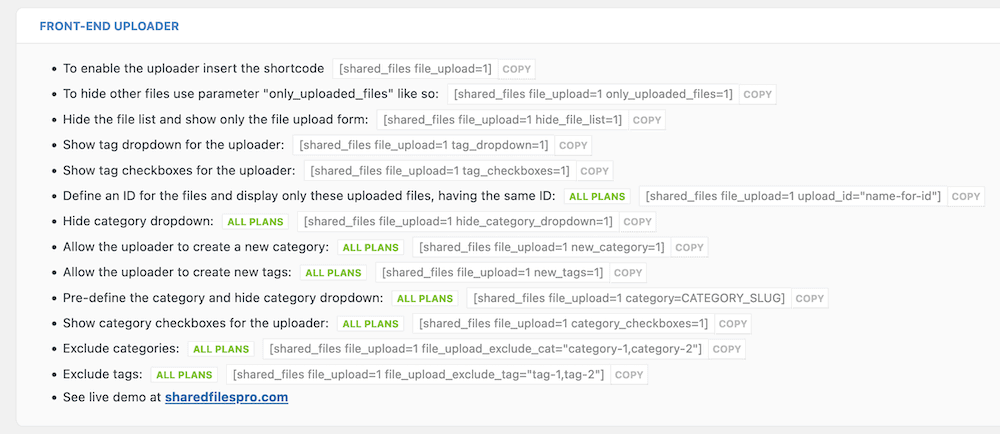
You might also want to refine what file types you allow for. You’re able to use Shared Files’ shortcodes to implement this in a pain-free way. The entire list of available shortcodes is on the Shared Files > Shortcodes screen:
You can also choose to list the shared files on your site, and do so with a number of different ordinal approaches. In the next section, we’ll run through how to do this.
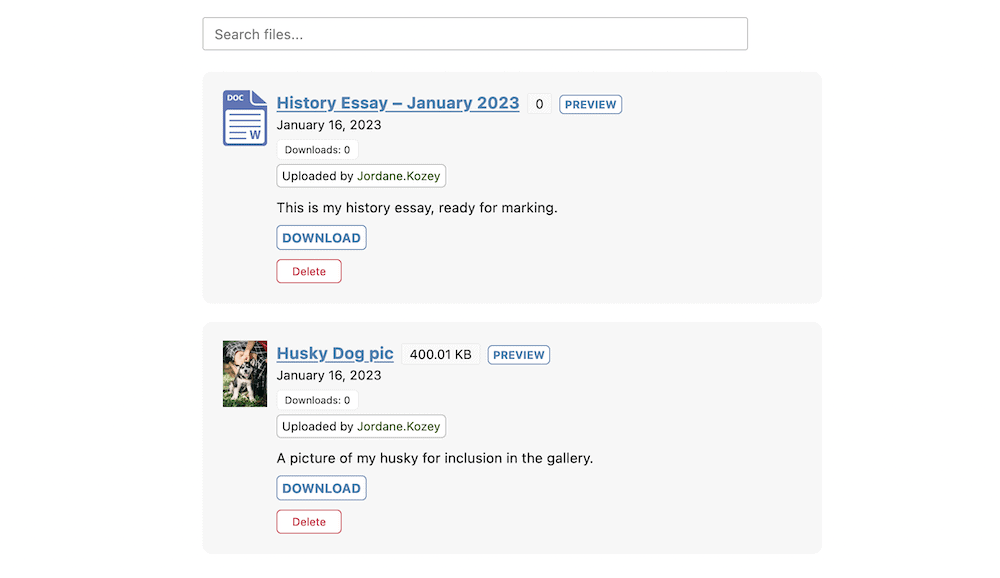
You’ll once again use shortcodes to display any shared files on your site. Simply add the [shared_files] shortcode to any post or page:
If you save your changes and check out the front end of your site, you’ll be able to see a list of available files:
However, you can also change the order of this list using shortcode parameters. For instance, the [shared_files order_by="post_date|_sf_main_date|title" order="ASC|DESC"] shortcode lets you choose how you order the list using one of each option between the ‘pipe’ symbols.
This gives you some flexibility with regards to how others will view your file list. You might want to show files in numerous columns for instance, or only files that belong to a certain category or tag.
With a premium subscription to Shared Files Pro though, you can enhance this further. Let’s discuss this in the last section.
In addition to the free version of Shared Files, there’s also Shared Files Pro – a premium version that includes much more to help you manage files on your WordPress website.

The plugin includes everything the free version does, and also comes with the following:
Shared Files Pro includes much more that we can’t cover here, but one standout feature is the expanded file uploader. Here, you have the ability to add categories at the time of upload – even new ones – and much more besides.
Shared Files Pro costs $7.99 per money, although there are annual and lifetime licenses available. It also comes with a 30-day money back guarantee – no questions asked.
Giving users the ability to upload files can benefit not only your site but its community too. Your administration time might come down also, which will mean you can look to run your site rather than worry about moving files around.
Shared Files is a fantastic way to manage uploads, especially thanks to the front-end file uploader. This gives your site a fast, simple, and secure way to receive files without your input. From there, you can manage these shared files from the WordPress dashboard.
The Shared Files plugin is completely free, but Shared Files Pro includes more ways to manage files and uploads. You can get onboard for $7.99 per month, and have a 30-day money-back guarantee.