

Media files make your website content more attractive and readable. By default, there is a Media Library available in WordPress. This is a place where all the uploaded files including audio, videos, and images are stored. However, with the increasing quantity of uploaded files, you need to organize them for smooth usage. The organization is a key factor in any success. The same refers to your WordPress site. Sometimes the users see a well-designed and very eye-catching website. Yet, the backend which is the Admin Dashboard of WordPress is messed up with different untitled files piled up during the years of site operation.
Here is where the WordPress Shared Files Pro plugin comes in handy. So, if you want to categorize your files effectively then it is time to know about the most important two features – categories and tags in the Shared Files Pro plugin. Keep reading the article, to get a step-by-step guide on how to categorize your files using categories and tags on WordPress with this plugin.
Aside from approving an easy user experience, categorizing files on WordPress will greatly benefit your site performance. This is because disorganized files may often cause broken links as well as make the file searching process more difficult.
Besides, file organization will make it easy to find the older versions of a certain document, as well as help you delete the unwanted ones that you no longer use.
In this case, you can categorize and assign tags to files on WordPress to ensure your website’s great performance and ease of use.
In the next sections, you will get helpful tips on how to categorize files and add tags to them through a feature-rich plugin – Shared Files Pro.
One of the main advantages of the Shared Files Pro plugin is that it offers to create an isolated location for your uploaded files. Through the front-end uploader, you can transfer your needed files to your website and keep them separate from your Media Library files. This will help you to store different kinds of files separately making your website more organized and your experience easier.
Yet, even in the case of isolated and controlled files, you need to add categories and tags to them especially when you deal with a big quantity of documents.
So, the Shared Files Pro plugin enables to:
In addition, your website users are also able to upload and add files to new categories.
Some features such as adding tags to files separated from the Media Library are available in the plugin’s free version. So, in order to activate the plugin, you need to complete the following steps:
In order to get many advanced features such as sorting files into categories, enabling your site visitors to upload documents into new categories, and finding out various WordPress search tags and categories, you have to activate the Shared Files Pro. So, here is how to activate the Premium version:
You can notice the categories and tags added to each of the uploaded files by entering the Shared Files Pro plugin’s dashboard which is visible in the “Menu” section of your WordPress Admin.
Here are the needed steps to take to categorize files with this plugin:
In your first step, you should find the Shared Files plugin in the “Menu” section.
Then you need to find the “Categories” submenu.

Moving forward you must fill in the required details to create a certain category. These include:
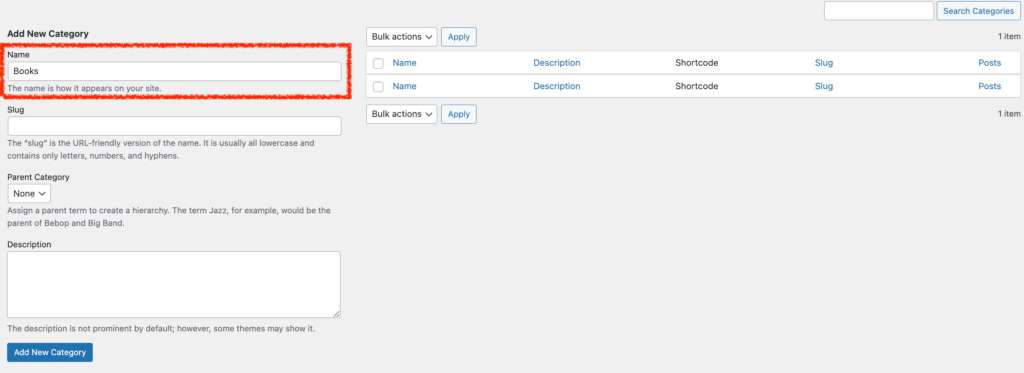
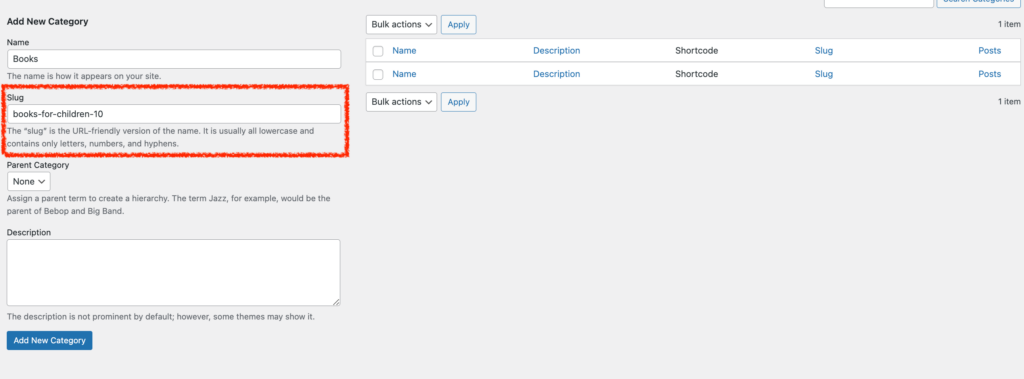
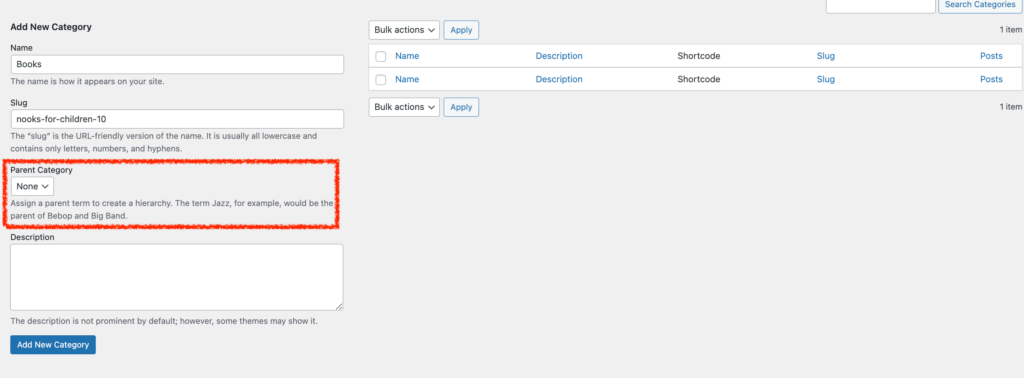
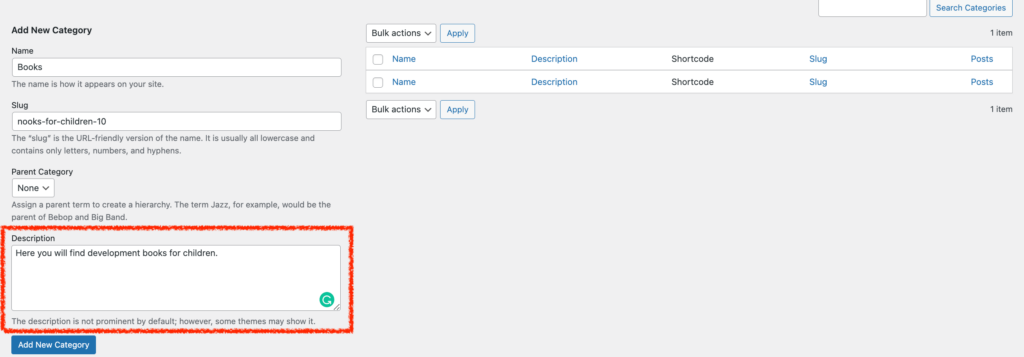
After adding these parts, you can tap the “Add New Category” button to create one in the WordPress Categories list. The plugin provides shortcodes for each of the categories for easy operation.

Step 4
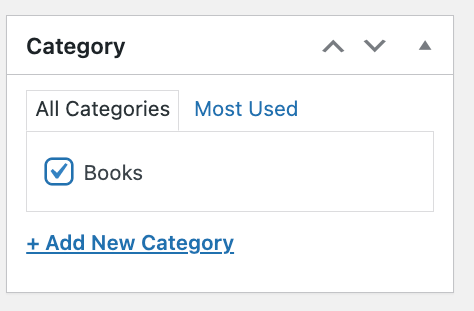
You can assign the created category to a certain uploaded file by choosing it from the available ones in the “Category” section as shown in the image below:
Adding tags to files with this plugin is very easy. Moreover, the feature is available in the plugin’s free version. So, any user that has already activated the plugin can utilize tags to easily manage and find different files on the WordPress site.
The main principle of adding tags is very similar to the process of assigning categories to files. So, here are the required steps to take while adding tags with the WordPress Shared Files plugin:
First, you have to find the “Tags” section from the Shared Files plugin’s submenu.

After entering the “Tags” section, you have to fill in the required fields, such as:


Having entered the required information into the empty boxes, you must tap the “Add New Tag” button to create a new label in your WordPress tags list.

Step 3
You can find and assign the newly created WordPress tags to the uploaded files very easily without hassles.

The Shared Files Pro plugin is a great file sharing plugin for WordPress. The plugin helps website owners not only deal with a big group of docs and files but also provides shortcodes and other simple features to make their experience even more pleasant.
Uploading files and assigning categories and tags to them is a matter of a few clicks. One of the outstanding options of this WP file manager plugin is that you get a separate file direction from the default Media Library. Moreover, all the added files can be easily categorized in the backend approving an organized view and smooth document searching process on WordPress. This will not only benefit your website performance but also quick file management.